• Skip to primary navigation
  • Skip to main content

Just Start Investing

We Make Investing Easy

  • Investing
    • Learn About Investing:
    • Investment Accounts
    • Online Brokerage Accounts
    • Investment Vehicles
    • Start Investing:
    • How to Invest in Index Funds
    • Start Investing with Betterment
    • Start Investing with Charles Schwab
  • Banking
    • Best Bank Accounts
    • Types of Bank Accounts:
    • Checking Accounts
    • Savings Accounts
    • CDs and Money Market Accounts
    • Online Banks vs Brick-and-Mortar
  • Credit Cards
    • Best Credit Cards:
    • Best Cash Back Credit Cards
    • Best No Annual Fee Credit Cards of 2021
    • Best Premium Credit Cards of 2021
    • Credit Card Tool: Find the Best Credit Card for Me
    • Learn About Credit Cards:
    • Types of Credit Cards
  • Blog
    • Investing
      • What is Crypto?
        • Crypto
      • What are stocks?
        • Stocks
      • What is a Real Estate Investment?
        • Real Estate Investments
      • What is an IPO?
        • IPO
    • Banking
    • Credit Cards
    • Budget
    • Finances
  • Earn with Crypto
  • Budget
    • How to Build a Budget
    • 24 Tips to Save More Money
  • Resources
  • About
    • Contact
    • Press
    • Learn More
    • Disclaimers
  • Show Search
Hide Search

Blog

How to Start a Digital Product Business

March 19, 2026 By Ana Rose

Starting a digital product business has become one of the easiest and flexible ways to make money in today’s digitally oriented world. Unlike physical businesses that require inventory, storage, and shipping, digital products business is comparatively low effort and low maintenance, making it the perfect starting point for beginners. Once a product is created, it can be delivered automatically to customers anywhere in the world, making this business model an appealing option for students, stay-at-home moms, freelancers, or even beginners looking for ways to make money online. With the right idea, strategy, and consistency, your digital product business can slowly grow over time and generate sales that can help you financially. This article will help you explore ways to start a digital product business, allowing you to grow a reliable source of income that can slowly but surely guide you towards a stable and secure financial future. 

How to Start a Digital Product Business

1. Understand What Digital Products Are

Before starting a digital product business, it is helpful to clearly understand what digital products actually are and why people choose to buy them. Digital products are items that people can download or access online instead of receiving in physical form through shipping.

These products can include ebooks, digital planners, templates, printable worksheets, design resources, online courses, or photography files that customers can instantly receive after purchasing. Since these products exist in a digital format, they can be sold again and again without needing to be recreated each time. This means one product can continue generating income over time while helping people solve problems or complete tasks more easily.

2. Choose a Niche to Focus On

Choosing a niche can help you build a digital product business that feels organized and purposeful instead of random and full of confusion. A niche simply means focusing on a specific topic or audience that may benefit from the type of product you plan to create. For example, some people create products for students who want study planners, while others focus on small business owners who may need social media templates or marketing guides.

When you focus on one clear area, you can better understand what your audience wants and what kind of products they may be willing to buy. This focus can help your business grow with a clearer direction.

3. Understand the Needs of Your Audience

Illustration of a person uploading a digital product to an online platform with listing elements on a pastel pink background.

When creating a digital product, it is important to think about the needs and problems that your audience may experience in their everyday lives. People often buy digital products because they can make something easier, faster, or more organized. 

From a busy parent who wants a weekly planner that can help manage household tasks to a student who may need a study guide that can help with exam preparation, it is important to understand what your audience actually needs. When you understand these needs, your product can feel more useful and meaningful to the people who buy it. Products that truly help people complete tasks or solve small problems can slowly attract more customers over time.

4. Research Products That Already Exist

Looking at products that already exist in the market can help you understand what people are currently buying and what types of digital items receive positive attention. Many online platforms allow you to see popular products, reviews from buyers, and examples of how different creators present their work. 

This research can give you ideas about what customers may find useful and what kind of designs or formats people enjoy using. Instead of copying someone else’s work, you can observe patterns and understand how successful products are designed. This knowledge can help you create something that feels useful while also offering your own approach or improvements.

5. Decide What Product You Want to Create

After understanding your niche and researching the market, you can begin deciding which type of digital product you want to create. Some people begin with simple items such as printable planners, checklists, worksheets, or templates that can help people organize tasks or information. Others may create ebooks, learning guides, or design resources that people can use for their projects. 

Starting with a simple product can make the process easier because it allows you to test your idea without spending too much time or effort in the beginning. Once your first product is ready, it can help you understand how the market responds.

6. Plan the Content of Your Product

Planning the structure of your product before creating it can help the process feel more organized and manageable. Instead of creating everything at once, you can outline the sections or pages that your product will include. For example, if you are making a digital planner, you can decide which pages will include goal tracking, daily schedules, or weekly planning sections. 

If you are writing an ebook, you can divide the information into chapters that guide the reader step by step. This kind of planning can help your product feel complete and easier for customers to use, which can improve their overall experience.

7. Create the Product Using Simple Tools

Once your plan is ready, you can begin creating the product using tools that allow you to design or write digital files. Many creators use simple design or writing software that can help turn ideas into organized digital documents. 

Complicated designs or confusing layouts can make the product harder for customers to enjoy which is exactly why a simple and clean structure should be prioritized so you can make the product feel more helpful and useful for your customers. 

8. Focus on a Clean and Simple Design

The design of a digital product can influence how people feel when they first see or use it. A product with a neat and simple layout can feel easier to understand and more pleasant to work with. Clear spacing, readable text, and organized sections can make a product more comfortable for customers to navigate. For example, planners can include clear boxes for writing tasks, while guides can use headings that separate different topics. 

When the design feels balanced and not crowded, people can use the product more easily. A well organized design can also make the product look more professional and trustworthy.

9. Choose a Platform to Sell Your Product

Illustration of a person planning a digital product by analyzing audience needs with notes and idea icons on a pastel pink background.

After creating your digital product, you will need a place where customers can purchase and download it. Online marketplaces and selling platforms allow creators to upload digital files and offer them to buyers from different parts of the world. These platforms can handle payments and deliver the product automatically after a purchase is completed.

This process can make selling much easier because you do not need to manually send files to every customer. When your product is available on a reliable platform, people can discover it while browsing or searching for useful resources that match their needs.

10. Set a Price for Your Product

Pricing your digital product is an important step because it can influence how customers perceive its value. When deciding a price, you can consider the usefulness of the product, the effort used to create it, and the prices of similar items already available in the market.

Some creators start with a moderate price and observe how customers respond before making adjustments later. A price that feels reasonable to buyers can encourage more people to try the product. As your business grows and your product collection expands, pricing decisions can also become easier to manage based on experience and customer feedback.

11. Write a Helpful Product Description

A product description can help customers understand what they will receive and how the product can be useful in their daily lives. Instead of only listing features, the description can explain how the product may help someone complete tasks, stay organized, or learn something new. For example, a digital planner description can explain how it may help someone plan their week or keep track of responsibilities. 

When the description is easy to read and clearly explains the benefits, customers can feel more confident about making a purchase. 

12. Promote Your Product Online

Online platforms can allow creators to share ideas, tips, or helpful information related to the product they are selling. For example, someone selling budgeting templates may share money saving ideas, while someone selling planners may share productivity suggestions.

When people see useful content connected to your product, they can become curious and explore what you offer. Promotion does not always need to feel complicated because even simple posts or helpful information can introduce your work to a wider audience that may eventually become customers.

Conclusion

Starting a digital product business can be a practical way to create income online while sharing useful resources with people who may benefit from them. By choosing a niche, understanding your audience, and creating products that help solve everyday problems, you can begin building a business that grows gradually over time. Digital products allow you to reach customers from different places without worrying about shipping or storage, which can make the process easier to manage. With consistent effort and thoughtful ideas, your collection of digital products can slowly expand and become a dependable source of income in the future.
How to Sell Printables on Pinterest

March 18, 2026 By Ana Rose

Selling printables online can feel like a simple and approachable way to build digital income because once the file is created, it can be sold again and again without worrying about shipping products, managing inventory, or dealing with packaging. One platform that can help bring attention to these digital files is Pinterest because people visit it to discover ideas, organize their plans, and search for tools that can make their daily routines easier. This platform works more like a visual search engine than a social network, which means your printable can appear in front of people who are already searching for something similar. This article can help you explore ways to sell printables on Pinterest, allowing you to slowly turn simple printable files into a steady stream of online sales with patience and a thoughtful strategy.

How to Sell Printables on Pinterest

1. Understand Why Pinterest Works for Printables

One of the first things you can do when planning to sell printables is understand why Pinterest can be such a powerful platform for this type of product. People visit this platform with the intention of finding helpful ideas, planning tools, and small resources that can make life easier. 

When someone searches for a solution like a daily planner or a meal planning sheet, your printable can appear as a helpful answer. Because pins can stay visible for months or even years, one well made pin can continue bringing visitors and potential buyers long after you first shared it.

2. Choose Printables That People Are Searching For

Before creating your printable, you can spend some time exploring the types of printables people already search for on Pinterest. You can look for common themes such as planners, budget trackers, cleaning schedules, school organizers, habit trackers, and kids activity pages. 

These ideas are often popular because they help solve everyday problems that many people experience. When you design a printable around something people already want, you can increase the chances that your pin will appear in search results. This approach can also make it easier for people to understand the value of your printable because it directly connects with something they are already trying to organize or improve in their daily routine.

3. Create High Quality and Useful Printables

A printable can become more appealing when it feels simple, helpful, and easy to use. Instead of filling the page with too many design elements, you can focus on making the printable clear and practical. Someone using your printable should feel like it genuinely helps them organize their day or track something important in their life. 

When people download a printable and feel satisfied with how it works, they can become more likely to recommend it or look for more printables from the same creator. This positive experience can slowly build trust and make your printable shop feel more reliable and helpful to future customers.

4. Design Attractive Pinterest Pins

Since Pinterest is a very visual platform, the design of your pin can strongly influence whether someone decides to click on it. A pin that uses clear fonts, calm colors, and a readable title can stand out while people scroll through their feed. You can also show the printable itself in the pin so viewers can quickly understand what they are getting. 

When a pin clearly shows the purpose of the printable, people can immediately imagine how it may help them. This simple clarity can increase curiosity and encourage more users to click through to see the printable in more detail.

5. Write Keyword Friendly Pin Titles and Descriptions

Words can play an important role in helping your pin appear in search results. When creating a pin on Pinterest, you can write titles and descriptions that include phrases people often search for such as printable planner, budgeting worksheet, or daily routine tracker.

These keywords help the platform understand what your content is about and who might benefit from seeing it. Clear descriptions can also help viewers quickly understand the purpose of the printable. When someone reads a title that directly matches what they need, they can feel encouraged to click and explore the printable further.

6. Link Your Pins to a Sales Platform

Every pin you share should guide people toward a place where they can actually download or purchase the printable. Many creators choose platforms like Etsy because it allows digital products to be sold easily through instant downloads. When someone clicks your pin on Pinterest, they should arrive on a page where they can clearly see the printable, read about its benefits, and quickly complete the purchase.

Making this process simple and smooth can help reduce confusion and encourage more people to turn their curiosity into an actual purchase.

7. Create Multiple Pins for One Printable

Illustration of a creator designing multiple Pinterest pins for one printable with different layouts on a pastel pink background.

One printable can often be promoted through several different pins. Instead of relying on a single design, you can create multiple pin images that highlight different aspects of the printable. One pin might focus on productivity while another might highlight organization or stress reduction. Each version can attract a slightly different audience on Pinterest. 

This strategy can increase your chances of reaching more people because different visuals and wording can connect with different types of users who are browsing the platform for helpful tools.

8. Organize Your Pinterest Boards Strategically

Pinterest boards can help organize your content and make your profile easier to explore. When your boards are clearly labeled with topics related to your printables, the platform can better understand what your content focuses on. For example, you can create boards for productivity planners, budgeting printables, home organization tools, or student planning sheets. 

Saving your pins into relevant boards can help Pinterest show them to users who are already interested in those topics. This organization can also make your profile look more focused and professional when someone visits it for the first time.

9. Pin Consistently to Stay Active

Consistency can make a noticeable difference when using Pinterest for promoting printables. Instead of posting many pins at once and then disappearing for weeks, you can try to pin regularly over time. This steady activity helps the platform recognize that your account is active and continuing to share useful content. 

As your collection of pins grows, more of your content can begin appearing in search results. Over time, this steady posting can slowly build a library of pins that continue bringing visitors to your printable listings.

10. Use Vertical Pin Designs

Vertical pins can perform better on Pinterest because they naturally take up more space on the screen when people scroll through their feed. A taller pin gives you more room to display the printable design and explain what it helps people do. This format can make the pin easier to notice among many other images. 

When a pin catches attention quickly, it can increase the chances that someone will pause and read the title. That small moment of attention can turn into a click that leads someone directly to your printable.

11. Show the Printable in Action

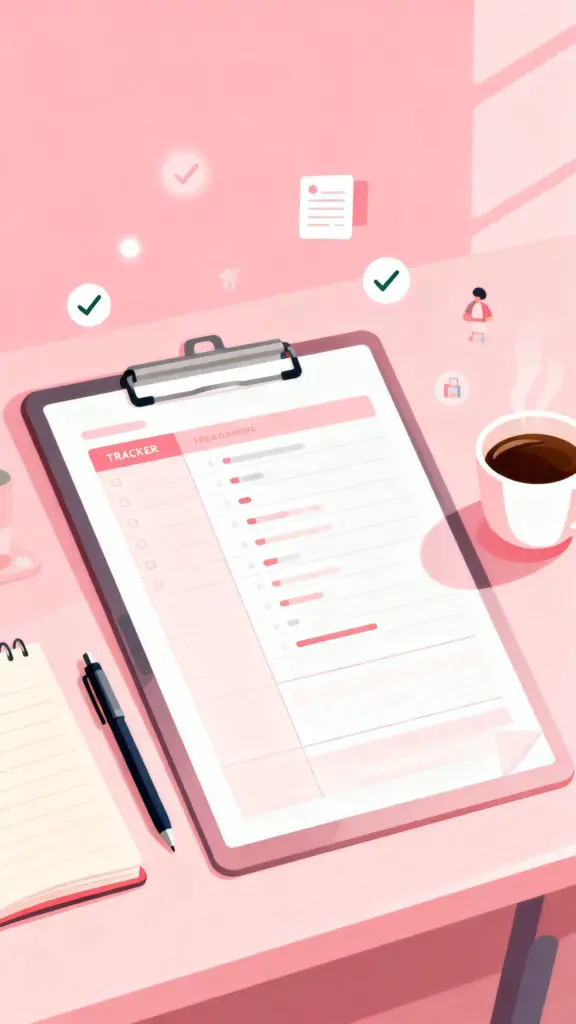
Illustration of a printable planner being used on a desk with everyday items like a pen and coffee on a pastel pink background.

Sometimes people connect more easily with a product when they can imagine themselves using it. Instead of only showing the flat design of your printable, you can present it in a small real life scene. For example, the printable can appear on a desk beside a notebook, a pen, or a cup of coffee.

These simple details can help viewers imagine how the printable might fit into their routine. When users browsing Pinterest see this kind of visual example, they can more easily picture how the printable might support their planning or organization.

12. Offer Free Printables to Build Trust

Offering a free printable can be a helpful way to introduce people to your work because when someone downloads a free printable and finds it useful, they can begin trusting the quality of your designs. This trust can make them more comfortable exploring your other products later. 

Sharing a free resource on Pinterest can also attract more people to your profile because free tools often encourage sharing and saving. Over time, these small interactions can lead more visitors toward your paid printable collections.

13. Pay Attention to Pinterest Trends

Trends on Pinterest can reveal what people are currently interested in organizing or improving. At different times of the year, people may search for school planners, goal trackers, holiday organizers, or summer activity sheets. By noticing these patterns, you can create printables that match what people are already looking for. 

This timing can help your pins appear when demand is naturally higher. When a printable connects with a seasonal interest, it can attract more attention because it feels immediately useful to the people searching for it.

Conclusion

Selling printables through Pinterest can become a rewarding way to share helpful tools while building digital income over time. By focusing on useful designs, clear pin images, thoughtful keywords, and steady posting, you can slowly create a presence that attracts people searching for organization and planning resources. Each pin you publish can become another small path leading viewers toward your printable collection. With patience and creativity, these simple digital files can continue helping people while also creating a growing stream of online sales.

How to Sell Digital Planners on Etsy

March 17, 2026 By Ana Rose

Selling digital planners on Etsy has become one of the most beginner friendly ways to build an online income using creativity and simple design tools. Many people are looking for planners that help them organize their schedules, track habits, plan budgets, and manage daily life in a calm and visual way. Because digital planners can be downloaded instantly, you only need to create them once and they can sell again and again without shipping or inventory. This makes the business simple to start even from home with very little cost. If you enjoy planning, designing, or organizing ideas, selling digital planners can become a rewarding and steady side income.

How to Sell Digital Planners on Etsy

1. Understand What Digital Planners Are

Before you start selling, it is important to clearly understand what a digital planner actually is and how people use it in their daily routines. A digital planner is a planner that customers download and use on tablets, iPads, or computers instead of using paper. People write inside them using stylus pens or typing tools while using note taking apps like GoodNotes or Notability. 

Many people prefer digital planners because they are reusable, easy to carry, and simple to organize without creating paper clutter. When you understand how customers use these planners, it becomes much easier to design planners that actually solve problems and make life easier for the people buying them.

2. Research What Planners People Are Buying

Successful shops begin with research because it helps you understand what customers are already searching for and purchasing. Spend time exploring digital planner listings on Etsy and observe the types of planners that appear often and receive many reviews. You will notice categories like daily planners, weekly planners, budget planners, fitness planners, and student planners. 

This process can help you see patterns in colors, layouts, and page styles that customers enjoy using. Research does not mean copying other shops, but it helps you understand the market and discover ideas that can inspire your own planner designs in a unique and helpful way for buyers.

3. Choose a Clear Planner Niche

Instead of creating one general planner for everyone, it is usually better to focus on a specific group of people who need help organizing a certain part of their life. For example you could create planners for students, busy moms, entrepreneurs, teachers, or people trying to improve their health habits. 

When your planner solves a clear problem, customers immediately understand why they should buy it. A niche also helps your shop stand out because your products feel more focused and thoughtful instead of trying to serve everyone at once. Choosing a niche can help guide your design choices and makes marketing your digital planners much easier in the long run.

4. Plan the Pages Your Planner Will Include

A digital planner should feel helpful and complete so it is important to plan the pages before you begin designing. Think about how someone will use the planner from the beginning of the year or month until the end. Many planners include yearly overview pages, monthly calendars, weekly layouts, daily planning pages, goal tracking sections, and habit trackers.

Some planners also include budget pages, meal planners, or reflection pages that help users review their progress. When your planner includes thoughtful pages that guide someone through their routine, it becomes more valuable and customers feel like the planner truly supports their goals and daily organization.

5. Design Your Planner Using Simple Tools

Illustration of a person designing a digital planner with simple tools on a laptop showing layouts and design elements on a pastel pink background.

You do not need expensive or complicated software to create beautiful digital planners because many beginners design their planners using simple platforms like Canva or Adobe Illustrator. These tools allow you to create clean layouts, choose soft color palettes, and organize planner pages in a professional looking way. Focus on creating designs that feel calm, simple, and easy to read rather than filling the pages with too many decorations. 

A well organized layout can help users focus on planning their day instead of feeling distracted. Clean designs often perform better because customers want planners that help them think clearly and stay organized.

6. Make the Planner Easy to Use

One of the most important parts of a digital planner is usability because customers will quickly leave a product that feels confusing or difficult to navigate. Many successful planners include clickable tabs and hyperlinks that allow users to move between months, weeks, and sections easily. 

This can create a smooth experience when the planner is opened inside apps like GoodNotes or Notability. A planner that feels smooth and intuitive will receive better reviews because customers appreciate tools that simplify their daily routine rather than making planning feel complicated or overwhelming.

7. Export the Planner in the Correct Format

Once your planner design is complete, the next step is exporting the file in a format that works smoothly for customers. Most digital planners are sold as PDF files because this format keeps the design consistent and allows hyperlinks to work correctly. Before listing your product, open the file on a tablet or device and test every page to make sure the navigation works properly. 

A small mistake like a broken link or missing page can frustrate customers and lead to negative feedback. Taking time to check your planner carefully ensures that buyers receive a product that works smoothly from the moment they download it.

8. Create an Attractive Etsy Listing

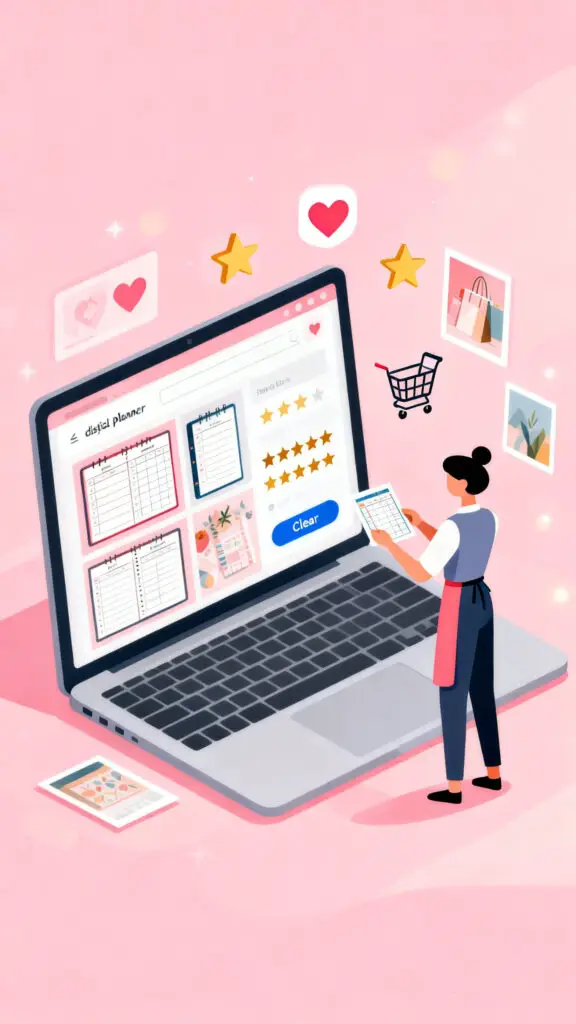
Illustration of a seller creating an attractive Etsy listing for a digital planner with preview images and shopping icons on a pastel pink background.

Your product listing plays a huge role in convincing people to click and learn more about your planner. When creating your listing on Etsy, use clear and bright preview images that show different planner pages so customers understand exactly what they are buying. Include images that demonstrate how the planner looks when used on a tablet so shoppers can imagine themselves using it daily. 

A well designed listing can build trust because customers may feel confident that the product is thoughtful and professional. The more clearly you present your planner, the easier it becomes for shoppers to decide that it is the right tool for them.

9. Write Clear Product Descriptions

A helpful product description answers the questions customers may have before they buy the planner. Explain what pages are included, how many pages the planner contains, and which apps or devices work best with the file. You should also clearly mention that the product is a digital download and not a physical planner that will be shipped.

When buyers understand exactly what they are purchasing, they are less likely to feel confused after the purchase. Clear descriptions help create positive customer experiences and reduce refund requests because shoppers know exactly how to use the planner once they download it.

10. Price Your Digital Planner Thoughtfully

Pricing can feel confusing in the beginning, but looking at similar digital planners on Etsy can give you a helpful idea of the typical price range. Many digital planners are priced between five and twenty dollars depending on the number of pages and the level of detail included. It is often better to start with a reasonable price that encourages buyers to try your planner without feeling hesitant. 

As your shop grows and your planners receive positive reviews, you can gradually adjust your prices. A fair price helps attract early customers and builds trust with people who are discovering your shop for the first time.

11. Use Keywords So Customers Can Find You

Keywords are the words people type when searching for planners on Etsy, so choosing the right keywords helps your product appear in search results. Think about phrases customers might search such as digital weekly planner, student digital planner, or budget planner for tablets. These keywords should appear naturally in your title, description, and tags. 

12. Create Multiple Planner Products

Many successful sellers grow their income by creating several planners instead of relying on only one product. You might design planners for different lifestyles such as fitness planners, budget planners, wedding planners, or student planners. Each new planner becomes another opportunity for someone to discover your shop. Over time your store can grow into a collection of helpful planning tools that serve many different types of customers. 

13. Promote Your Planners on Social Media

Social media can help your planners reach people who may not yet be searching on Etsy. Platforms like Pinterest and Instagram are especially powerful because people use them to discover organization ideas, planning routines, and productivity tips. You can share images of planner pages, show how the planner works on a tablet, or post short planning tutorials that inspire others to stay organized. 

14. Provide Good Customer Support

Customer support may seem less important with digital products, but it actually plays a big role in building a trusted shop. Sometimes customers may need help downloading their planner or understanding which apps to use with the file. Responding politely and clearly to messages shows buyers that you care about their experience. 

Over time these reviews can  help build credibility for your shop on Etsy and make new customers feel comfortable purchasing from you.

Conclusion

Selling digital planners on Etsy can become a rewarding and creative online business when you focus on designing helpful tools that truly support people in their daily lives. By researching planner ideas, choosing a clear niche, creating simple and thoughtful designs, and presenting your products clearly, you can build a shop that continues to attract new buyers. Digital planners have the advantage of being reusable and easy to distribute which means your work can continue earning income long after it is created. With patience, creativity, and consistent effort, your planner shop can slowly grow into a reliable source of online income.

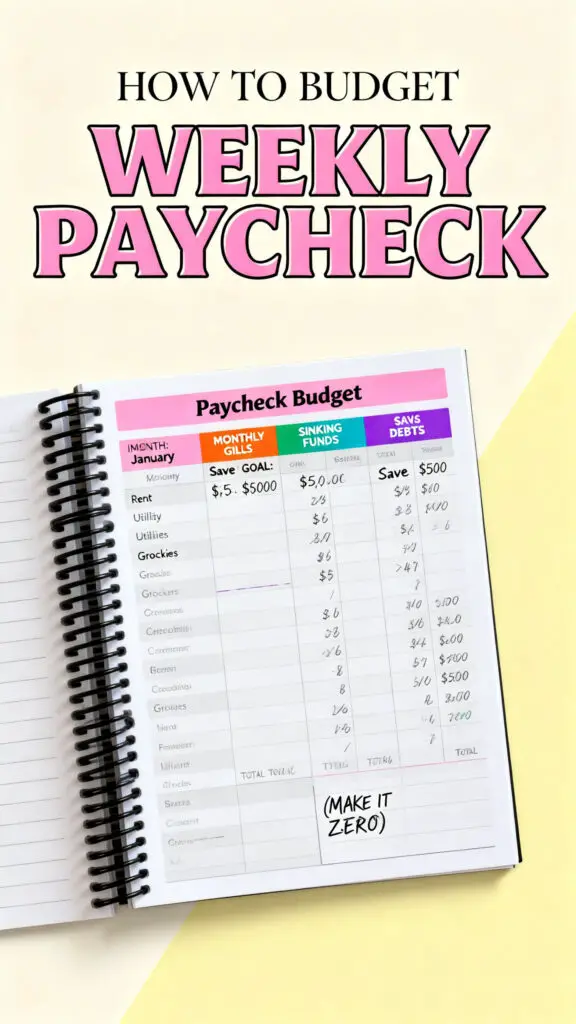
How To Budget Weekly Paycheck

March 16, 2026 By Ana Rose

Managing money can feel confusing when your paycheck comes in every week and expenses seem to appear from every direction. Many people receive their income weekly but still struggle to understand where their money goes by the end of the month. Creating a weekly budget helps you take control of your finances in a simple and practical way. Instead of feeling stressed about bills or unexpected spending, a clear plan allows you to give every dollar a purpose before it disappears. When you build a weekly budgeting routine, you can start noticing patterns in your spending and slowly develop stronger financial habits that can help you save, spend wisely, and feel more confident about your money decisions.

How To Budget Weekly Paycheck

1. Understand Exactly How Much You Earn Each Week

The first step in budgeting a weekly paycheck is understanding the exact amount of money you receive after taxes and deductions. Many people think about their salary in general terms but rarely pay attention to the precise number that lands in their account every week. Knowing your real weekly income helps you make decisions based on reality instead of rough estimates. Take a moment to review your pay stub and identify your net income because once you clearly know what you are working with each week, you can begin assigning portions of that money to different needs such as bills, groceries, transportation, and savings.

2. List All Your Weekly and Monthly Expenses

A good weekly budget always begins with creating a complete and thoughtful list of your expenses because understanding where your money goes is the foundation of managing it wisely. Some of these expenses appear every week while others only show up once a month, yet both types still need to be included in your weekly planning so that nothing catches you off guard later. 

Take time to write down everything you regularly spend money on including rent, groceries, electricity, transportation, subscriptions, phone bills, and even the small everyday purchases that quietly add up over time. After listing them, convert your monthly bills into smaller weekly amounts so they fit smoothly into your weekly budgeting system and become easier to manage. 

3. Separate Needs from Wants

One of the most valuable habits you can build while budgeting is learning to clearly recognize the difference between essential needs and optional wants because this understanding shapes the way you prioritize your money. 

Needs are the expenses that support your basic living requirements such as housing, groceries, utilities, transportation, and other necessary bills that keep your daily life running smoothly. Wants, on the other hand, are the purchases that bring comfort, fun, or enjoyment but are not required for survival, such as eating out frequently, buying new clothes for no urgent reason, entertainment subscriptions, or spontaneous shopping decisions. When you begin budgeting your weekly paycheck, the smartest approach is to make sure your needs are fully covered first so your most important responsibilities are always secure and handled. 

4. Divide Your Paycheck Into Spending Categories

Once you have a clear understanding of your expenses, dividing your paycheck into specific spending categories becomes much easier and far more effective. Many people choose simple categories such as housing, groceries, transportation, savings, personal spending, and emergency funds because these areas represent the most common financial priorities in everyday life. 

Assigning a certain portion of your weekly paycheck to each category gives every dollar a clear purpose and prevents money from disappearing through random or careless spending during the week. Instead of constantly wondering whether you can afford a certain purchase, you simply look at the category that was created for that type of expense and check whether there is money available within it. 

5. Set Aside Money for Monthly Bills Each Week

Even though some bills arrive monthly, preparing for them weekly can make budgeting much easier. For example, if your monthly phone bill is one hundred dollars, you can set aside twenty five dollars from each weekly paycheck so the full amount is ready when the bill arrives. This approach can make it easy by spreading the cost across several weeks rather than forcing you to cover the entire amount at once. 

Over time this habit can remove a lot of financial pressure because large expenses no longer feel overwhelming. You can gradually build a routine where every paycheck quietly prepares you for upcoming responsibilities.

6. Create a Weekly Grocery Budget

Illustration of a person creating a weekly grocery list and budgeting for food expenses with groceries and checklist icons on a pastel pink background.

Food is one of the most flexible parts of a budget, which means it can either support your financial goals or quietly drain your paycheck. Creating a weekly grocery budget allows you to plan meals, avoid unnecessary purchases, and reduce food waste. 

Before shopping, consider the meals you plan to cook during the week and make a simple grocery list based on those meals. This habit keeps spending predictable and helps you stay within the amount you set aside for food and over time, you may also notice which grocery habits help you stretch your money further.

7. Track Your Spending Throughout the Week

Budgeting does not end after you create your plan, because the real challenge is staying aware of how your money moves during the week. Tracking your spending can help you notice where your paycheck is going and whether you are following the limits you set for yourself.

Some people use budgeting apps while others prefer writing expenses in a notebook or simple spreadsheet. The method is less important than the consistency of tracking and by reviewing your spending regularly, you can stay connected to your financial decisions and adjust quickly if something starts going off track.

8. Set a Weekly Savings Goal

Saving money becomes easier when it is treated as a regular expense rather than something you only do when extra money appears. When budgeting a weekly paycheck, choose a realistic amount that you can consistently move into savings every week. 

Even small contributions can grow over time because the habit of saving matters more than the size of each deposit. By paying yourself first and protecting that portion of your paycheck, you gradually build financial security and reduce the stress that often comes with unexpected expenses.

9. Build an Emergency Fund Slowly

Unexpected situations such as medical bills, urgent repairs, or sudden travel needs can disrupt even the most careful budget. An emergency fund protects you from relying on credit cards or borrowing money during stressful moments. Instead of trying to build this fund quickly, focus on contributing small amounts from each weekly paycheck. 

Over time those contributions can grow into something meaningful like a financial cushion that provides you with peace of mind and protects you in case of financial crisis. Knowing that you have money set aside for emergencies can also allow you to approach your budget with more confidence and stability.

10. Plan for Personal Spending

A healthy budget does not eliminate fun or enjoyment from your life, instead, it creates space for it in a responsible way. Setting aside a small portion of your weekly paycheck for personal spending can allow you to enjoy things like coffee, hobbies, entertainment, or social outings without guilt and because this money is already part of your plan, you can spend it freely without worrying that you are harming your financial progress. 

This balance makes budgeting feel sustainable rather than restrictive, which increases the chances that you will continue following your plan long term.

11. Use Cash or Digital Envelopes

Illustration of a person organizing money into labeled budget envelopes for different spending categories on a pastel pink background.

Many people find it easier to manage money when they separate it into different envelopes or digital categories. The envelope method works by placing specific amounts of money into labeled sections such as groceries, transportation, and entertainment. When the envelope becomes empty, spending in that category stops until the next paycheck arrives. 

This visual system can help prevent overspending and keeps your budget clear and organized. Even if you prefer digital banking, many budgeting apps allow you to recreate this envelope system virtually.

12. Review Your Budget Every Week

A weekly budget works best when it is reviewed regularly rather than created once and forgotten. At the end of each week, take a few minutes to look at how you spent your money and compare it with your original plan. 

This short review can help you identify areas where you stayed disciplined and areas where you might want to adjust. Instead of judging yourself harshly for mistakes, treat these reviews as learning opportunities that improve your financial awareness and strengthen your future budgeting decisions.

Conclusion

Budgeting a weekly paycheck does not require complicated formulas or strict financial expertise. It simply requires awareness and consistency. By understanding your income, organizing your expenses, and giving each portion of your paycheck a clear purpose, you create a system that supports both your responsibilities and your personal lifestyle. Over time, weekly budgeting turns into a powerful habit that strengthens your financial confidence and helps you make smarter decisions with your money. With patience and practice, this simple routine can lead to greater stability, stronger savings, and a more peaceful relationship with your finances.

How to Sell Your Photos Online

March 15, 2026 By Ana Rose

Many people take beautiful photos every day without realizing that those photos can become a real source of income. With the rise of online platforms and digital marketplaces, photographers no longer need a studio, expensive equipment, or professional connections to start selling their work. Even simple photos taken with a good smartphone can attract buyers if they capture useful moments, clear compositions, or relatable scenes. Businesses, bloggers, designers, and marketers constantly need fresh images for websites, advertisements, and social media. This growing demand has created many opportunities for photographers who are willing to share their work online. If you enjoy taking photos and want to turn that passion into income, learning how to sell your photos online can open a practical and creative way to earn money.

How to Sell Your Photos Online

1. Build a Strong Collection of High-Quality Photos

Before you begin selling your photos, it is important to build a strong collection of images that show quality, variety, and usefulness. Buyers usually look for clear, well-lit, and properly composed photos that can be used in blogs, advertisements, websites, or marketing materials. Instead of uploading random pictures from your camera roll, try to focus on photos that look clean and professional while still feeling natural and relatable. 

Everyday scenes such as people working, food on a table, city streets, nature landscapes, and lifestyle moments are often in high demand. When you create a thoughtful portfolio filled with different types of images, you increase your chances of attracting buyers who are searching for visuals that fit their projects.

2. Choose the Right Platforms to Sell Your Photos

One of the most important steps in selling photos online is selecting the platforms where you will upload and sell your work. There are many websites designed specifically for photographers where businesses and creators purchase images for commercial use. Each platform works slightly differently, but most of them allow photographers to upload photos and earn a percentage every time someone downloads or licenses the image. 

Some websites focus on stock photography while others allow direct sales to buyers. By researching different platforms and understanding their rules, commission rates, and audience types, you can decide where your photos will have the best chance of selling and reaching the right people.

3. Understand What Types of Photos Sell the Most

Not every photo sells equally online, so understanding market demand can make a big difference in your success. Many buyers search for photos that represent everyday life, business environments, technology use, health themes, education, travel, food, and social interactions. 

Photos that tell a story or show real-life moments often perform better than overly staged images, for example, a simple photo of someone working on a laptop at home may attract bloggers, marketers, and website owners who need images that represent remote work or productivity. When you pay attention to trending topics and common themes used in advertising and online content, you can create photos that are more likely to attract regular buyers.

4. Use Proper Lighting and Clear Composition

Lighting and composition play a huge role in making a photo look professional and appealing to buyers. Natural light often works best because it creates soft shadows and balanced colors that make photos feel authentic and pleasant to look at. Try to avoid extremely dark images, blurry shots, or photos with distracting backgrounds that take attention away from the main subject. 

A clean composition where the subject is clearly visible can make your photo more useful for designers and content creators. Even simple photos can look impressive when the lighting is balanced and the frame is thoughtfully arranged.

5. Write Accurate Titles and Descriptions for Your Photos

Uploading a photo alone is not enough to attract buyers because people usually find images by searching keywords on a platform. This is why writing clear titles and descriptions for your photos is extremely important. 

A good description helps buyers understand what the photo shows and how it can be used, for example, instead of using a vague title, you can describe the scene with specific details such as location, activity, mood, or subject. Accurate descriptions also help platforms categorize your images correctly, which improves their chances of appearing in search results when someone is looking for a specific type of photo.

6. Add Relevant Keywords to Increase Visibility

Illustration of a photographer adding keywords and tags to an uploaded photo on a laptop to improve search visibility on a pastel pink background.

Keywords work like search signals that help your photos appear in front of the right audience. When someone searches for an image, the platform looks at keywords attached to each photo to decide which results to display. 

Adding relevant and descriptive keywords increases the chances that your images will appear in search results, for example, if you upload a photo of a cup of coffee on a desk, keywords could include coffee, workspace, morning routine, productivity, office desk, or remote work. Thoughtful keyword selection can dramatically improve the visibility of your photos and help more buyers discover your work.

7. Upload Photos Consistently

Consistency plays a big role in building success as an online photographer. Uploading photos regularly helps your portfolio grow and keeps your account active on selling platforms. When you add new images often, you increase the number of opportunities for buyers to discover your work. 

A larger portfolio also allows you to experiment with different themes, styles, and subjects to see which types of photos attract the most attention. Even uploading a few photos each week can gradually build a strong library of images that continues generating income over time.

8. Focus on Useful and Commercial Images

Many photographers focus only on artistic photos, but commercial usefulness is often what drives online sales. Businesses and marketers usually search for images that support their messages, products, or services. Photos showing teamwork, technology use, studying, cooking, travel, or healthy lifestyles are frequently purchased for websites and marketing campaigns. 

When you create photos with practical use in mind, you make it easier for businesses to imagine using your images in their content. A balance between creativity and usefulness often produces the best results in online photography marketplaces.

9. Edit Your Photos Carefully

Photo editing can enhance colors, adjust brightness, and improve the overall appearance of an image, but it is important not to overdo the editing process. Buyers usually prefer natural-looking photos that can easily match different types of projects. Small adjustments in brightness, contrast, and sharpness can make your photos look polished without appearing unrealistic. 

Removing small distractions or correcting color balance can also improve image quality. Careful editing ensures that your photos maintain a professional appearance while still looking authentic and versatile for different uses.

10. Protect Your Work with Licensing Options

When selling photos online, it is important to understand how image licensing works. Licensing allows buyers to use your photo legally while you still remain the owner of the image. Different licenses allow different levels of use, such as website content, advertisements, or marketing materials. 

Most photography platforms manage licensing automatically, which protects both the photographer and the buyer. Understanding these options helps you feel more confident about selling your work and ensures that your images are used in a fair and legal way.

11. Promote Your Photography on Social Media

Promoting your photography outside selling platforms can help bring more attention to your work. Social media platforms allow photographers to share their images with a wider audience and build a personal brand around their style. 

By posting your photos regularly and engaging with people who appreciate photography, you can attract potential buyers who may visit your portfolio or photography store. Sharing behind-the-scenes moments, editing processes, or photo stories can also help people connect with your work and become interested in purchasing your images.

12. Create a Personal Photography Portfolio Website

Illustration of a photographer creating a personal photography portfolio website showing multiple photo galleries on a laptop with a pastel pink background.

Having your own photography website can make you appear more professional and give buyers a direct place to view and purchase your images. A portfolio website allows you to organize your photos into categories, showcase your best work, and provide contact information for potential clients. 

While selling platforms bring traffic automatically, a personal website gives you more control over how your photos are displayed and marketed. Over time, this can help you build a recognizable photography brand and attract direct clients who are interested in your style.

13. Pay Attention to Trends and Seasonal Demand

Certain types of photos become more popular during different times of the year or during specific trends. For example, photos related to holidays, travel seasons, remote work, or new technology trends often gain more attention at certain moments. 

Observing what businesses and content creators are currently discussing can give you ideas for new photo themes. Creating images that match seasonal or trending topics increases the likelihood that your photos will be searched for and purchased by people who need relevant visuals for their projects.

Conclusion

Selling photos online offers an exciting way to turn creativity into income while sharing your perspective with people around the world. By building a strong collection of high-quality images, understanding what buyers need, and consistently uploading useful photos, photographers can gradually develop a portfolio that attracts steady interest. Simple steps such as writing accurate descriptions, adding keywords, and promoting your work can greatly improve your chances of making sales. Although success may take time, patience and persistence can transform photography from a hobby into a rewarding online opportunity that continues generating income as your portfolio grows.

  • « Go to Previous Page
  • Go to page 1
  • Interim pages omitted …
  • Go to page 15
  • Go to page 16
  • Go to page 17
  • Go to page 18
  • Go to page 19
  • Interim pages omitted …
  • Go to page 170
  • Go to Next Page »

The Latest Blog Posts:

  • 14 Profitable Things To Sell On eBay June 20, 2026
  • Mason Jar Crafts To Make And Sell June 19, 2026
  • 12 Best Jobs for Retired Teachers  June 18, 2026

As Featured In:

Just Start Investing Press Strip 2020 B&W

Follow Us:

  • Facebook
  • Twitter
  • Pinterest

Copyright © 2026 · Just Start Investing LLC

  • Contact Us
  • Blog
  • Privacy Policy / Disclaimers